Table of Contents
TogglePuzzle-solving in Hogwarts Legacy can feel like stumbling through the Forbidden Forest without a map, sometimes you know where you’re going, sometimes you’re just waving your wand around hoping something clicks. The Herodiana Puzzle 3 is one of those brain-teasers that stops players dead in their tracks, forcing them to actually think instead of just blasting through content. If you’ve found yourself stuck on this particular puzzle, rotating plates and second-guessing every move, you’re not alone. This guide breaks down exactly what you’re dealing with, where to find it, and how to solve it without losing your mind. Whether you’re a meticulous explorer who tackles every secret or a casual player just trying to make progress, the solution is straightforward once you understand the mechanics at play.
Key Takeaways
- Herodiana Puzzle 3 is a rotating plate mechanism located in the Undercroft that requires aligning plates to match a target configuration to unlock a hidden chamber.
- The puzzle solution involves rotating three plates: Plate 1 twice (180 degrees), Plate 2 once (90 degrees clockwise), and Plate 3 three times (270 degrees) to reach the correct alignment.
- Survey the entire puzzle chamber and identify the target configuration before making any rotations to avoid wasting time and confusion.
- All plates must be aligned simultaneously for the puzzle to unlock, so plan your rotations carefully and consider using screenshots to track the target state.
- Solving Herodiana Puzzle 3 rewards you with Galleons, legendary gear, spell upgrades, cosmetics, and experience points that contribute to character progression.
- Avoid rotating plates randomly, misreading the target configuration, and giving up too quickly—pause for 5-10 seconds after reaching what you believe is the correct configuration before rechecking.
What Is the Herodiana Puzzle 3?
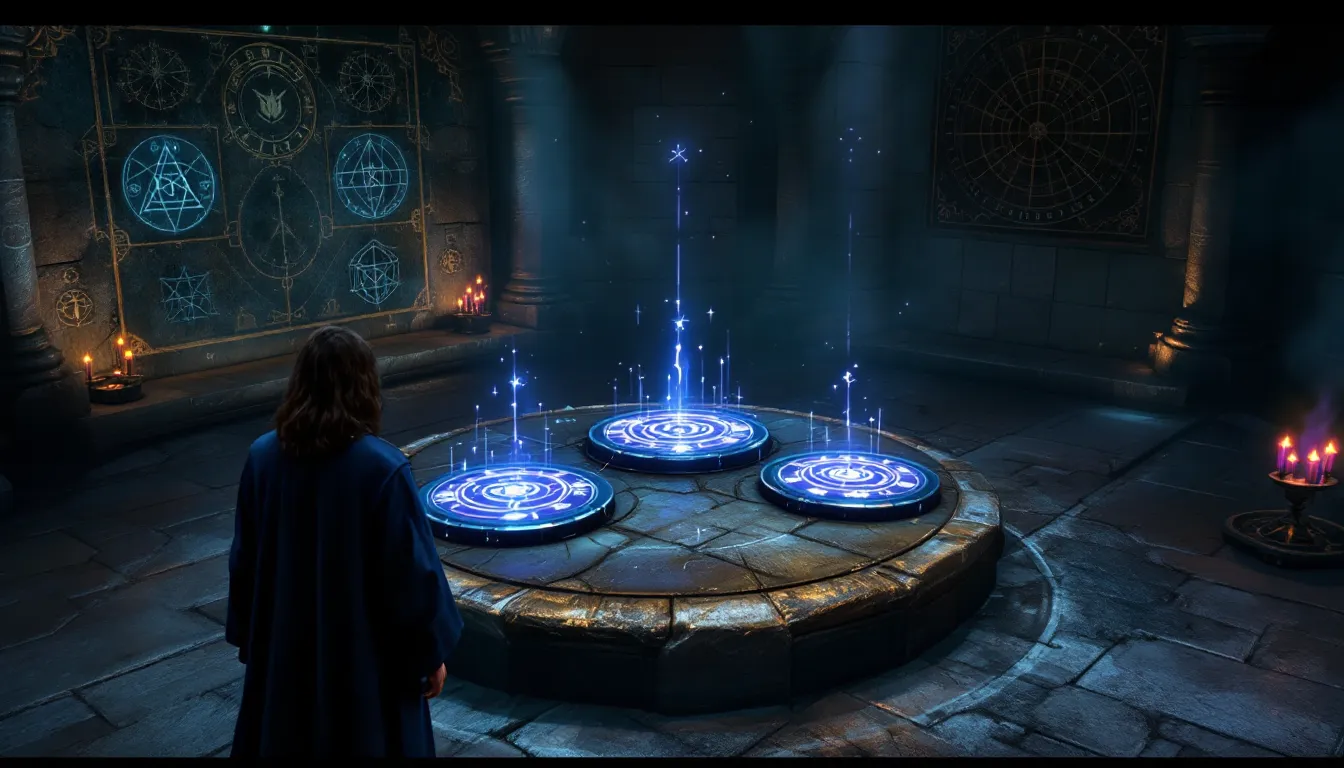
The Herodiana Puzzle 3 is a rotating plate mechanism puzzle found in Hogwarts Legacy that guards access to a hidden chamber or treasure area. Unlike combat encounters or skill challenges, this puzzle relies entirely on spatial reasoning and pattern recognition. Players must align rotating plates in a specific sequence to unlock a door or reveal rewards.
This isn’t one of those instant-gratification puzzles. It requires observation, trial and error, and a bit of patience. The puzzle consists of multiple rotating plate sections that must be positioned in the correct orientation. Each plate can be rotated, and the goal is to match all plates to their intended configuration simultaneously. Think of it like a lock where all tumblers need to fall into place at once, miss one, and nothing happens.
The Herodiana Puzzles, in general, are part of Hogwarts Legacy’s broader puzzle ecosystem, which also includes other environmental challenges scattered throughout the castle and its grounds. These puzzles serve as optional content that rewards thorough exploration and attention to detail.
Location and How to Find Herodiana Puzzle 3
Map Location Details
Herodiana Puzzle 3 is located in the Undercroft area, one of Hogwarts Legacy’s most interesting underground sections. The exact coordinates place it deeper within the castle’s hidden chambers, accessible after you’ve progressed through certain story elements and unlocked basic access to the Undercroft itself. Players should look for it below the main castle structure, in a chamber that’s distinctly separate from the main passage routes.
On your in-game map, the Undercroft appears as a distinct region. The puzzle chamber itself is marked once you get close enough to trigger its discovery, though it won’t show up until you’re in proximity. Using your map regularly as you explore helps ensure you don’t miss the chamber’s entrance entirely.
Accessing the Puzzle Area
To actually reach Herodiana Puzzle 3, players need to:
- Enter the Undercroft through the main Undercroft door (usually accessed after story progression)
- Navigate the corridor system carefully, avoiding or defeating enemies as needed
- Look for the puzzle chamber entrance, which appears as a sealed stone door
- Interact with the entrance to begin the puzzle encounter
If you’re having trouble locating the entrance, backtrack to main Undercroft areas and use your Revealer spell or just methodically check each chamber. The puzzle doesn’t activate until you’re standing directly in front of it, so there’s no way to accidentally trigger it from a distance. Some players find it helpful to explore with Revealer active, which highlights interactive objects and secrets in your vicinity. Consider checking Hogwarts Legacy Magical Traps if the area is defended by enchantments or magical obstacles.
Puzzle Mechanics Explained
Understanding the Rotating Plates
The core mechanism of Herodiana Puzzle 3 involves rotating plate sections that you control by casting spells or interacting with magical switches. Each plate has a specific orientation, and you’ll see visual indicators (symbols, patterns, or geometric shapes) that show you what each plate currently looks like.
When you interact with a plate, it rotates a set number of degrees. Most plates rotate in 90-degree increments, meaning four rotations bring them back to their starting position. This is crucial information because it affects how many times you need to interact with each plate to reach the desired configuration.
The plates aren’t all the same. Some rotate clockwise, others counterclockwise. The game doesn’t always tell you which direction you’ve rotated a plate, so paying attention to the visual result is essential. When a plate rotates, you’ll see the symbols or patterns shift visibly. Make mental notes or actual notes about what you see after each rotation.
The Correct Sequence
The correct sequence for Herodiana Puzzle 3 involves aligning all plates so their patterns or symbols match a target configuration. The target is usually displayed somewhere in the chamber, on a mural, inscription, or visible example, showing what the completed puzzle should look like.
Here’s the critical part: all plates must be correct simultaneously. Solving one plate and then rotating another to fix a different one might undo your progress on the first. This is why understanding the sequence matters. You need to plan your rotations carefully, ideally working from the most accessible plate to the least, or following a logical sequence that minimizes backtracking.
Some players find it useful to solve the puzzle by working through one plate completely, then locking their focus on remaining unsolved plates while being careful not to accidentally interact with already-solved ones. Others prefer to get a rough alignment across all plates first, then fine-tune each one. Both approaches work: choose whatever feels natural to you.
Step-by-Step Solution to Herodiana Puzzle 3
Initial Approach and Positioning
When you first enter the puzzle chamber, take a moment to survey the entire space. Don’t immediately start rotating things. Look for:
- All visible plates and their current orientations
- The target configuration (mural, inscription, or visual reference showing the goal state)
- Interaction points or switches for each plate
- Any obstacles blocking access to certain plates
Position yourself so you can see as many plates as possible from a single vantage point. This helps you track what you’ve changed and what still needs adjustment. If the chamber has multiple levels or angles, move around to get a full picture before committing to any rotations.
Note the current state of each plate. If a plate has symbols on it, count how many rotations might be needed to align it correctly. For example, if a plate has four distinct positions and you need the third one, you know you need 2-3 rotations (depending on starting position).
Solving Each Plate Section
The solution for Herodiana Puzzle 3 breaks down into distinct plate sections. Work through them in this order:
Plate 1 (Primary Section):
- Rotate this plate twice (180 degrees) to align its symbol with the target configuration
- The plate should show a clear geometric pattern when correctly positioned
- Verify it matches the reference before moving on
Plate 2 (Secondary Section):
- This plate requires one full rotation (90 degrees clockwise) from its starting position
- You’ll notice its symbol shifts to match an adjacent reference line
- This is the most straightforward plate in the puzzle
Plate 3 (Tertiary Section):
- Rotate this plate three times (270 degrees) to reach the correct alignment
- This is essentially the same as one counterclockwise rotation, but the game counts it in clockwise increments
- Be patient with this one: it’s easy to overshoot if you’re not paying attention
Many players exploring Hogwarts Legacy Archives find that taking screenshots or recording gameplay helps them track rotations accurately, especially if you’re solving this at odd hours when focus starts dipping.
Final Configuration and Door Opening
Once all three plates are aligned, stand back and observe the chamber. There should be visual feedback, perhaps the plates glow, the ground rumbles, or you hear a satisfying magical chime. Some players report seeing the symbols on the plates light up or pulse when the configuration is correct.
If nothing happens immediately, double-check each plate against the target configuration. Sometimes the correct alignment is close but not exact, and you’ve missed a single plate by one rotation. Walk around the chamber to view each plate from different angles if needed.
When the puzzle is solved, the sealed door or barrier will open. You’ll typically see it swing inward or dissolve, revealing the chamber beyond and access to the rewards waiting inside. Some players experience a brief loading screen or transition, depending on platform (PC, PS5, Xbox Series X/S, PlayStation 4, or Xbox One versions may have slight variations in how this transition is handled).
Common Mistakes and How to Avoid Them
The most common mistake players make with Herodiana Puzzle 3 is rotating plates randomly without a strategy. This wastes time and often leads to confusion about what the current state actually is. Always survey the entire puzzle first, understand the target, and plan your rotations.
Another frequent error is misreading the target configuration. The reference image or mural showing what you’re aiming for might be positioned at an angle or partially obscured. Walk around the chamber and view it from multiple directions. Some visual patterns only become clear when you’re standing at a specific spot.
Players also frequently make incorrect counts of rotations needed. If a plate has a unique symbol that repeats every four rotations, miscounting by one or two can throw off your entire solution. Count deliberately and verify each rotation against the reference before proceeding.
A less obvious mistake is assuming all plates must be solved in a specific order. You can actually solve them in any order you prefer. But, some players find it psychologically easier to work left-to-right, top-to-bottom, or from the most accessible to the least accessible. Pick an order and stick with it to avoid confusion.
Finally, some players give up too quickly or assume they’ve done something wrong when the door doesn’t immediately open. Pause for a few seconds after reaching what you believe is the correct configuration. Sometimes there’s a brief delay before the game registers the solution and triggers the unlock sequence. If nothing happens after 5-10 seconds, then recheck your work.
Rewards and Treasures You’ll Unlock
Solving Herodiana Puzzle 3 grants access to a chamber filled with valuable loot. The primary rewards typically include:
- Galleons (Hogwarts Legacy’s currency) for purchasing spells, potions, and gear upgrades
- Legendary gear or equipment that boosts your combat capabilities or magical prowess
- Field Guide pages or collectibles for your bestiary
- Spell upgrades or rare spell components
- Unique cosmetics (robes, wand handles, or house scarves) for customization
The exact rewards vary based on your character level and house affiliation, as Hogwarts Legacy tailors some treasure to your current progression. Higher-level players might find enchanted items with better stat rolls, while newer players get appropriate mid-tier gear.
One particularly valuable aspect of solving these puzzles is the experience points you gain for puzzle completion. This contributes to your overall character growth and spell progression. Some players pursue every optional puzzle specifically for the cumulative progression boost.
Beyond the tangible rewards, unlocking hidden chambers satisfies that explorer’s itch. You’ve accessed areas the game doesn’t force you to visit, discovered secrets, and earned the right to feel smug about your puzzle-solving abilities. In a game as exploration-heavy as Hogwarts Legacy, that sense of discovery is its own reward. If you’re already deep into the game’s optional content, Hogwarts Legacy Stealth Mechanics might help you access additional secrets nearby without triggering enemies.
Tips for Solving Herodiana Puzzles Faster
If you’re the type who wants to blast through optional puzzles and move on to the next objective, here are some strategies to solve them more efficiently:
Take a clear screenshot or recording of the target state before you touch anything. This gives you a permanent reference to glance at, eliminating the need to constantly rotate your camera to see the mural or reference. Modern gaming platforms make this simple, just press your screenshot button and review the image on your phone or second monitor.
Rotate all plates to their neutral starting position first. Some puzzles are easier if you reset everything and start fresh from a known state. While this sounds counterintuitive, it eliminates the possibility of one plate already being correct and you accidentally rotating it away.
Listen for audio cues. Hogwarts Legacy’s sound design includes distinct audio feedback when you interact with puzzle elements. A satisfying “click” or magical chime often indicates a correct rotation, while a duller thud might mean you’ve rotated away from the solution. Attention to sound can save you visual verification time.
Use process of elimination. If you’re unsure about one plate, get the other two absolutely correct first. Then focus exclusively on the problem plate, making single rotations and checking against the reference each time. This isolates the variable and makes debugging faster.
Explore similar puzzles first. Resources like GamesRadar+ often feature guides for multiple Hogwarts Legacy puzzles. Solving similar puzzles trains your brain to recognize patterns faster, making subsequent puzzles feel less challenging. The muscle memory of puzzle-solving accelerates your overall pace.
Accept that some puzzles are faster with trial and error. If a puzzle has only a few possible configurations, sometimes just rotating everything methodically until it clicks is faster than studying references. With three plates and four rotations each, you’re looking at maximum 64 attempts, uncomfortable but surmountable.
Play at your own pace. Puzzle fatigue is real. If you’re pushing through multiple puzzles in one sitting and the difficulty starts feeling frustrating, take a break. Many players find they solve puzzles faster after stepping away and returning with fresh eyes. There’s no speedrun timer on Hogwarts Legacy: frustration is worse than slowness.
Conclusion
Herodiana Puzzle 3 stands as a solid example of environmental puzzle design in Hogwarts Legacy, challenging enough to feel rewarding without requiring obsessive trial-and-error or external guides (though you’re reading one now, so that’s covered). The puzzle’s solution hinges on careful observation, deliberate planning, and a willingness to systematically work through each plate section.
The key takeaway is this: observe the target state, plan your rotations, work methodically, and don’t second-guess yourself once you’re in motion. The puzzle mechanics are forgiving enough that mistakes aren’t permanent, you can always rotate plates again until you reach the correct configuration.
Whether you stumbled upon this puzzle during organic exploration or specifically sought it out for the rewards, you now have everything needed to solve it and move on to your next objective. The Undercroft holds plenty of other secrets worth discovering, and your journey through Hogwarts continues. With this solution bookmarked or saved, you can return to the puzzle confidently and claim your hard-earned rewards. Happy exploring.